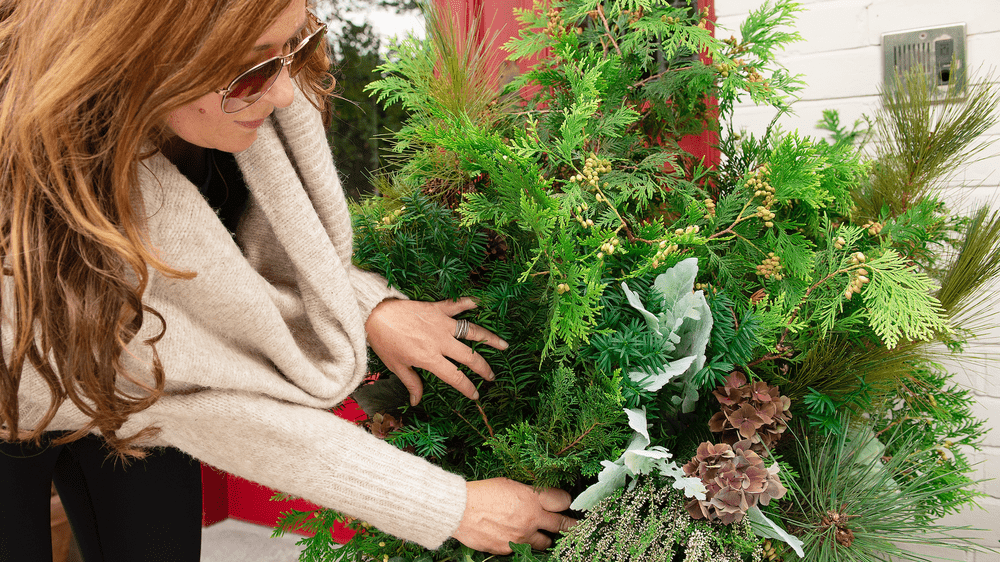
This year, make a festive planter with an assortment of evergreen branches, hardy plants and a large dose of holiday spirit.
We trimmed our overgrown bushes and then turned this end-of-season planter into a festive masterpiece in five easy steps. TIP: If you are cutting the shrubs in your garden to use for decorating, place the stems in a bucket of water to keep them fresh. Once they are nestled in the container’s moist soil, they will continue to absorb water until they freeze into place.

Materials
- Evergreen boughs like cedar, yew and pine clipped from your shrubs or found at your local garden centre
- Stems of hydrangea flowers
- Hardy live plants like dusty miller, heather and English ivy
- Twigs
- Garden soil
- Pruners and gloves

To Make
1. Assess the planter and prepare the base. If your container is cast iron, concrete or resin, it will withstand a cold winter without cracking and can easily be replanted for winter. To get started, remove
all of the plants that are left in the pot and set aside any that are cold hardy that you may want to reuse (such as small evergreens, trailing ivy, dusty miller, heather and ornamental cabbage). Next, top up the soil so it comes
to just below the top of the pot. It’s important to fill the urn with soil (not foam or sand), as it will be the medium that holds all of the branches in place, keeps them moist and freezes them in place to withstand the coldest and windiest days.
2. Begin with the tallest branches — the filler.
Giving each evergreen stem a fresh cut, begin arranging the branches in the urn with the tallest ones in the middle and the smaller ones toward the outside. For scale, the tallest branch should measure about three-quarters the height of the urn. Mix and match different evergreens to add texture and a variety of colours and shapes. Here, we used cedar as the tallest branches and yew and pine to surround it. As you are creating, walk around the urn to make sure it looks good from every angle. If something doesn’t look right, pull it out and start again.
3. Add plants — the spiller. Once the evergreen base has taken the shape you like best, tuck in any plants you may have saved and make sure their roots are buried into the soil. Adding trailing ivy back into the planter balances the shape of the whole planting.

4. Continue with festive touches — the thriller. If you have cones, seeds, berries, ribbon, ornaments or even dried hydrangea flowers, add them into the planter for extra wow factor. Make sure they are secured in the soil or to a strong branch, so they don’t blow away.
5. Water well. A good watering will keep the live plants happy and the cut greens moist until they freeze into place. Maintain by making sure the soil is damp and by misting the branches a few times a week.

Jennifer Reynolds, our previous Editor-in-Chief, is a long-time authority in gardening, do-it-yourself projects, urban sustainability, parenting, placemaking and community matters. Her features and columns have been published in Canadian Living, Canadian Family, Gardening Life, House & Home, Globe & Mail, National Post, Toronto Star & more. Plus, her designs and expertise have been featured on dozens of HGTV, W Network and CTV shows.

