The importance of eating well has never been as popular as it is today. Given the increase in the number of processed foods available in supermarkets, it is a challenge for anyone who wants to snack on fresh, healthy food.
Growing your own snack food is a great way to combat the temptation of grabbing a bag of potato chips. As you plant, nurture and harvest your own vegetables, fruit and seeds, there is a general sense of satisfaction every step of the way.
I am here to offer a short tutorial that will get you to an abundant and healthy harvest.
Sweet Potato Fries

I’m told that sweet potato fries are nutritious and low in calories. This is good news, because I enjoy snacking on them. They are also easy to grow. Sweet potatoes are drought tolerant, and mine have never had problem pests or disease.
Grow sweet potatoes from slips, short cuttings with five or six leaves. I place the slips in water until they grow roots. Don’t be in a hurry to plant sweet potatoes outdoors. Wait until the soil is warm and there is absolutely no chance of frost.
Plant sweet potatoes in a location with full sun, at least six hours per day. If possible, choose a location sheltered from direct wind. This will reduce moisture loss through the leaves.
I use a string line to help me plant in a straight row, which makes it easier to keep the area weed-free.
As the plants grow, mound the soil up around the stems. This encourages better root production, which is the goal, as potatoes are, of course, a root crop.
When to harvest: Sweet potatoes don’t stop growing until they’re out of the ground or the ground freezes. Keep an eye on the calendar and check at the 90-day mark for harvesting. If you want larger sweet potatoes, wait longer.
How to store: Sweet potatoes are best eaten after about six weeks of curing. After picking, brush off dirt clumps and store the potatoes in a warm (26°C/79°F), humid place for eight days. Follow that by storing them in a cool (12°C/54°F), dry place for six weeks. Stores for several months.
Pumpkin Seeds
Roasted pumpkin seeds are a seasonal treat, and I look forward to them every fall. There are four must-haves when growing pumpkins: space, water, rich soil and plenty of sun.
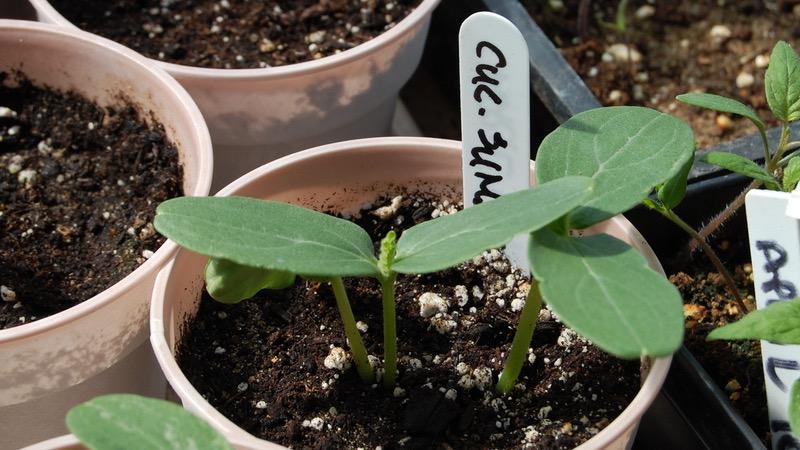
Pumpkins are best grown from seed sown directly into your garden. Wait until the soil is warm and there is no chance of frost. Before sowing, cover the area with at least 3 cm (just over an inch) of finished compost. You can turn this layer of compost under with a tiller or spade, or let the earthworms do it for you. Create mounds of rich earth, at least a metre (three feet) apart and 50 cm (20 inches) wide, in soil that is at least 20 cm (eight inches) deep. That will give mature pumpkin plants enough space to spread out without overcrowding. To ensure success, sow two or three seeds per mound. Once the seeds germinate, thin each mound to the one strongest plant.
Pumpkins require consistent moisture until the seeds germinate. As the plants grow and begin to flower, it is very important to provide a consistent source of moisture. The goal is to keep the soil moist without wetting the leaves. Apply water early in the morning to ensure that the foliage dries quickly, reducing the chance of powdery mildew.
As pumpkins begin to grow, I place straw mulch under each fruit to keep them off the soil. This greatly reduces the chance of rot before harvest.
Dried Apple Rings
Most apples are hardy to Zone 4 and some are hardy to Zone 3 (Edmonton). To ensure pollination, plant two or more varieties that bloom at the same time.
Apple trees prefer a location in full sun, but they will tolerate some shade. The soil should be a rich, moist, well-drained loam. Apple trees will withstand a wide variety of soil conditions as long as the location is not water logged.
Prune apple trees in late winter before new growth begins. The goal of pruning is to open up the structure of the tree to improve air circulation and light penetration.
Spray apple trees with dormant oil and lime sulfur in early spring, before blossoms appear, to control a wide range of overwintering insects and diseases. Many problems can be controlled by maintaining a healthy, vigorous tree. Water deeply and maintain a thick layer of mulch around the root zone. Proper pruning for air circulation helps reduce mildew problems.
Peanuts
To grow your own peanuts, start with raw (unroasted) peanut seed peanuts. In most parts of Canada, we are able to harvest peanuts successfully. Look for the Spanish type and buy peanut seed from the seed rack. Ontario Seed always carries them on their seed racks.
Choose a location with full sun. Loosen the soil and add sharp sand to improve the drainage. Wait at least one week after the last frost before planting. Peanuts are very sensitive to frost. Plant peanuts 25 to 30 cm (10 to 12 inches) apart and water them deeply.
Water your peanut plants on a regular schedule. Do not allow the soil to dry out completely. The goal is to maintain consistent moisture throughout the growing season.
When to harvest: Wait until the leaves begin to turn yellow (this will be a good way into the fall, most likely). Check one pod for its maturity: the pods should be a good size, and the seeds inside should take up the interior space of the pod.
How to store: Unshelled peanuts can be kept in the refrigerator for about nine months; shelled peanuts, three months. Freeze for long-term storage. Fresh peanuts roasted in the oven are easy, and there is nothing that tastes quite like them!
Popcorn
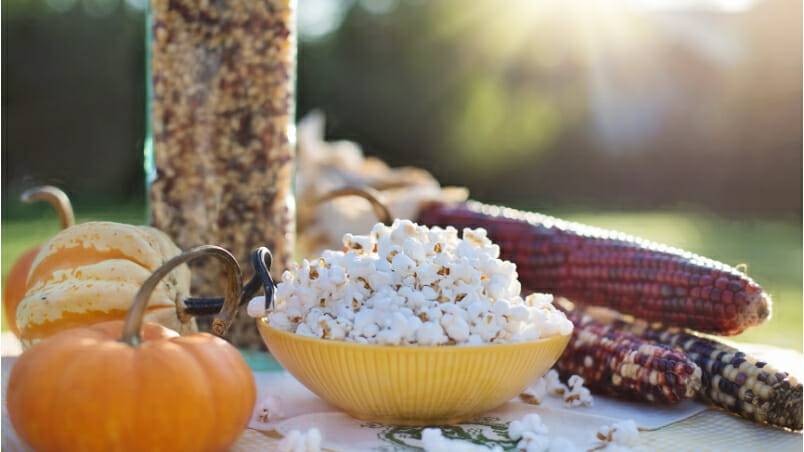
 Popcorn kernels do not come from sweet corn. Look for a starchy variety, like ‘Robust’. It produces cobs that are 20 cm (eight inches) long on tall, strong plants.
Choose a location in full sun, with a minimum of six hours of direct sun each day. Add generous quantities of finished compost to the soil. This will provide nutrients to the corn plants throughout the growing season.
Sow seeds directly in the garden as soon as all danger of frost has passed. Bury seeds 2 cm (0.8 inches) deep and at least 20 cm (eight inches) apart. Water the area well and continue to water on a regular schedule. Do not allow the soil to dry out completely.
Make a habit of working the soil between the rows, to keep the weeds down. As you do that, pull some of the soil up to the base of the corn plants. This will add extra support to the growing stalks.
When to harvest: Wait until the husks turn brown and the kernels have dried before harvesting. I hang the ears of corn in my potting shed for two to three weeks to further dry the kernels.
Sunflower Seeds
Sunflowers are possibly the easiest plant—and snack—to grow. I grow dozens of sunflower varieties in my garden every year. Confection-type sunflowers are the best for snacking. For this purpose, I grow ‘Mammoth Russian’, ‘Giganteus’ and ‘Super Snack Mix’.
Sow sunflower seeds directly in the garden once all danger of frost has passed. Choose a location in full sun and with well-drained soil. Add generous amounts of finished compost to the soil before planting.
Sow seeds 1 cm (0.4 inches) deep and 50 cm (20 inches) apart. Water the area and keep the soil moist for the next seven to 10 days, until the seeds germinate.
Keep weeds under control to ensure that the plants are not competing for space and nutrients.
When to harvest: Wait until the stalks are dry before removing the heads. It is important to harvest the seed heads before the first frost. Hang the seed heads in a dry location and protect them from freezing temperatures.
Mark Cullen is an expert gardener, author, broadcaster and tree advocate
and holds the Order of Canada. His son, Ben, is a fourth-generation
urban gardener and a graduate of the University of Guelph and Dalhousie
University in Halifax. Follow them at markcullen.com, @MarkCullen4
(Twitter) and @markcullengardening (Facebook) and look for their latest book, Escape to Reality.
Follow them at markcullen.com, @MarkCullen4, facebook.com/markcullengardening and biweekly on Global TV’s national morning show, The Morning Show.


