It’s easy to love warm floors in winter. I know because I’ve installed different kinds of in-floor heating systems in homes large and small. I also live with in-floor heating in my rural Ontario home and workshop. The thing is, making warm floors happen when just a small area needs heat can be a challenge. The technical complication of installing pumps, pipes and valves for a hot water system is impractical for small installations, but this is where electric in-floor heating makes sense. While electricity is a very expensive way to heat in most places, the higher cost of electric heat doesn’t matter much for small areas of floor.

I installed my first electric in-floor heating system in 2007, and technology has gotten a lot better since then. My current favourite system is called Ditra-Heat by a company called Schluter. I have no reason to recommend it except that I’ve never seen anything perform as well. Different electric in-floor heating systems are unique in the way they go down. The one I’ll be showing you here uses snap-in-place heating cables that connect to a power supply and thermostat.
How In-Floor Heating Saves Money
Studies show that when your feet are warm, you’re more comfortable at a lower overall room temperature compared with heat delivered by hot-air floor registers or baseboard heaters. Depending on the insulation levels of your home and the outside air temperature during winter, heated floors usually run 2ºC to 5ºC (35.6°F to 41.0°F) warmer than thermostat set points for room temperature. This is warm enough to make feet feel great, allowing you to reduce overall room temperature a couple of degrees lower than normal while still feeling comfortable, and you’re still saving some energy in the process.
Until now, the only non-hydronic floor-heating option has been electric heating mats or free-floating cables installed under finished floors, but I know from experience that these can be a hassle to put in and are fragile enough to stop working after the finished floor goes down. Tearing up a floor just to get the electric heat working again is a disaster I’ve had to deal with. Ditra-Heat is different, but before I explain how it works, you need to understand something about how uncoupling membranes operate and why they’re important.
Uncoupling membranes were invented to increase the reliability of ceramic tile installations, and they do it in a way that’s easy to misunderstand. While it’s obvious that ceramic tiles need to be properly supported in order to resist cracking, what’s less obvious is the way the different expansion and contraction rates of tiles versus subfloors can also be a damaging source of cracking and grout failure.
Everything in the world expands and contracts as it changes in temperature, and the rate of expansion and contraction of ceramic tiles is almost always different from the rate of the subfloor underneath. This explains why tiles sometimes crack even when they’re installed on a super-stiff subfloor like poured concrete. Uncoupling membranes allow a small amount of side-to-side movement between a subfloor and the tiles above it to relieve pressure. And although this movement is too small to see, it can make all the difference for preventing cracks.

System Part 1: The Uncoupling Membrane
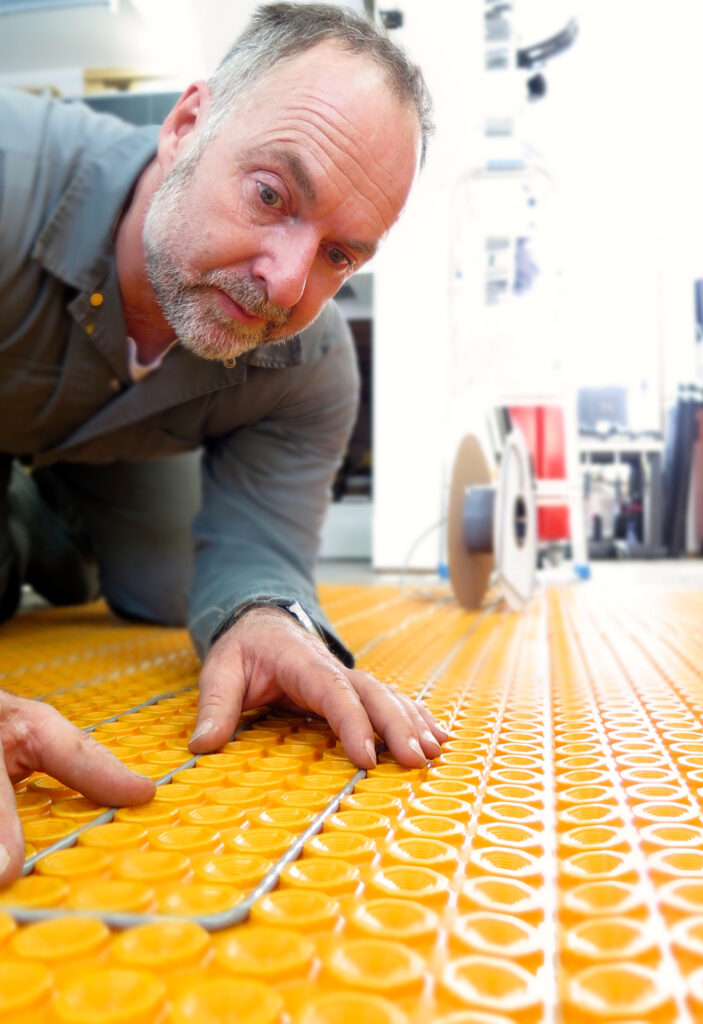
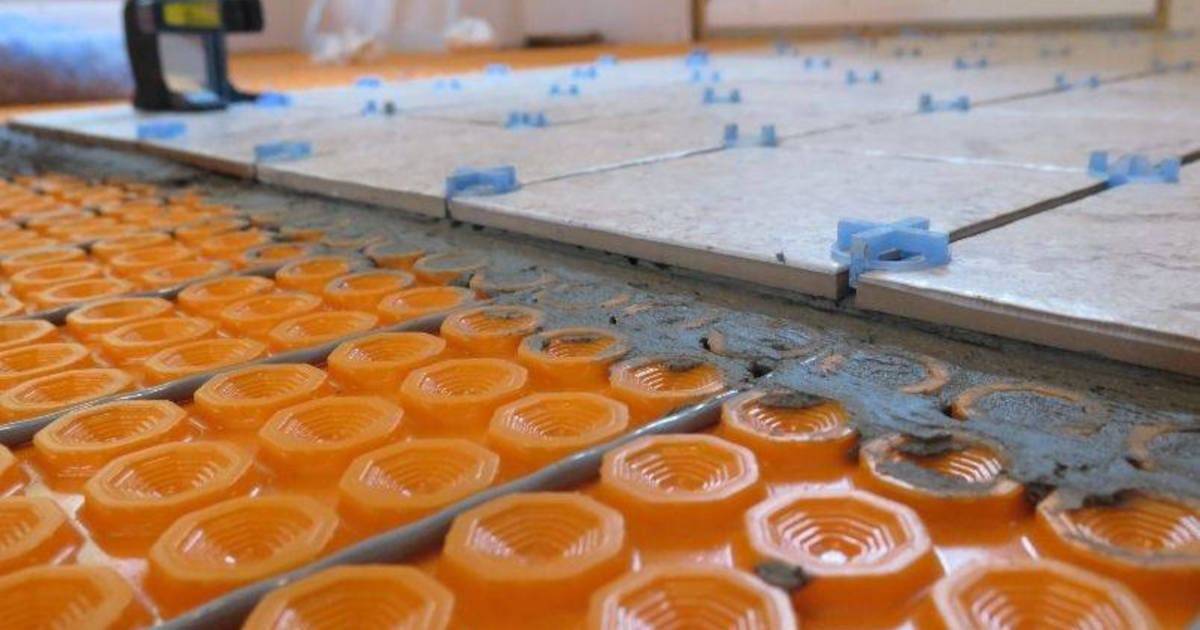
This part of the installation goes down just like regular plastic uncoupling membranes under ceramic tiles, except that the membrane in this case is made to accept heating wires. Use modified thin-set mortar if you’re installing it over a wood sub-floor, and unmodified if you’re working over concrete. Later on, use unmodified thin-set mortar to secure the tiles to the membrane. Before this happens, you’ve got to do something else, and it has to do with the round dimples on the top of the plastic uncoupling membrane. These raised shapes are spaced so the heating cable snaps into place during installation, offering flexibility in layout. As with any hydronic system, you’re free to provide heat where it’s desired and leave it out where it isn’t. The ability to customize the installation on-site is a big advantage of snap-in wired installations. Electric heating mats, by contrast, are all custom-made in a factory and must be used as is. Perhaps the biggest advantage of the snap-in heating system is that you don’t need to pour leveling compound over the wires before setting tile, saving you time and trouble.
Tiny Warm Floor Zones
If you need to economize on costs, locate your warm floors only where you need them. A warm bathroom floor is always nice, and I know some people who have a warm zone in front of a basement couch, for toasty toes while watching movies. A warm zone on the floor on either side of the bed makes for a great start to the day, too.

System Part 2: The wires
Besides the ability to customize every installation, the heating wires snap into the uncoupling membrane so they’re protected physically and also placed immediately below any tile you install later, for optimal heat conduction. All wires end up being slightly below the surface of the membrane when they’re snapped into place, so they’re less likely to suffer damage. You still have to be careful when applying tile mortar with a notched trowel, but the wire is mostly protected by design.
Check Warranties First
Damaged wires and failure to heat is the biggest problem with the pre-made, mat-style in-floor heating systems I’ve installed in the past. One of my jobs using a factory-built mat system from back in 2007 went bad a year after installation with no warranty support from the manufacturer, and I’ve heard from a handful of homeowners with the same problems. By contrast, the manufacturer warrants the reliability of Ditra-Heat to the extent that they’ll replace the entire floor—materials and labour—if it goes bad.
The only drawback with Ditra-Heat is that the wires can’t be cut on-site. They have factory-installed connection fittings at one end, and they’re sealed at the other. To ease this no-cut issue, you can order heating wires in different sizes of spools to be combined in one installation, so you need to do some figuring to make sure you’ve got the right amount.
When you start work, install wires at the connection box first, then work back from there. As you snap wires into place, remember that you’re not allowed to go more than 10 feet in a straight line with any run of wire. You need to make a bend in long, straight runs of cable to create a little slack so the expansion and contraction forces of the floor don’t stress the wires. You’ve also got to keep the wires at least three dimples apart from run to run to prevent overheating.

Tile Alignment Made Easy
Although you don’t need a laser layout tool for tile installations, these tools make accuracy a lot easier to achieve. Notice how the red laser lines show up along the floor (directional TK), marking the corner-to-corner alignment of tiles and the location of grout lines.

System Part 3: The Controls
As you’d expect, the entire in-floor heating system is controlled by a programmable thermostat. In addition to pre-set start and stop times, there’s something called an “anticipated start,” which works to bring room temperature up to the set point by a given time of day, instead of switching to a higher set point at a programmed time. Want to wake up to full room temperature at 6:30 a.m.? The system learns how much earlier than this it needs to switch on and start heating. You can get wireless and wired thermostats, depending on what makes sense. New installations are fine for wired thermostats, though renovations are often easier with wireless systems. You can simply put a wireless thermostat anywhere without the need for wiring to connect to it.
True advances in building options don’t happen too often, but when they do they can make a big difference. The ability to easily warm floors here and there in your home is one way you can make a long Canadian winter seem shorter.
Steve Maxwell and his wife Mary live on a 90-acre modern homestead on Manitoulin Island, Ontario in a stone house they built with local materials beginning in 1985. Steve is Canada’s longest-running home improvement and how-to columnist and editor of Home and Property. He divides his time working on the land, building things large and small, and creating articles and how-to videos that teach sustainable, self-reliant, hands-on living skills.


