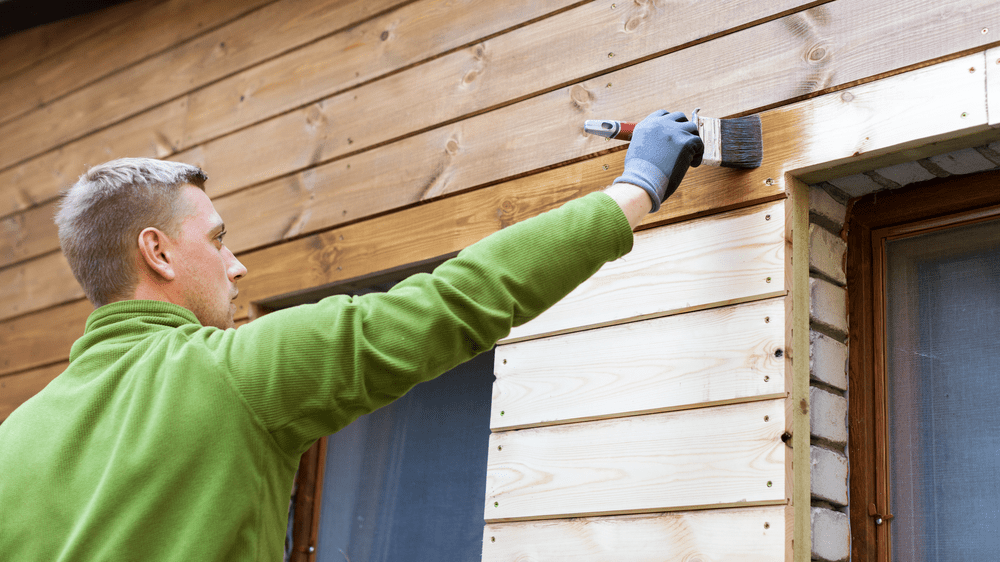
Finishing outdoor wood tops the list of home improvement problems that I help Canadians with online, and this is because of something surprising. Two things, actually. Unprepared wood—both old and new—is a poor candidate for accepting a finish and hanging on to it for a long time. The second reason for trouble is that a large proportion of outdoor finishing products simply don’t have what it takes to last more than a year or two. All this is why I started testing different outdoor wood finishing products and strategies back in 1990. I’m still at it. The four steps you’ll find here cover everything I’ve learned since then.
Step No. 1: Identify your situation
When it comes to outdoor wood, there are three main categories of surfaces: horizontal, vertical and furniture. Decks get hit with water, abrasion and sunlight, and that’s why you usually need to finish them differently than, say, a fence. A wooden deck chair may have a small surface area, but there are also countless nooks and crannies that will make it a nightmare to maintain the finish if you start off using a product that forms a film and peels in time. Fences and siding, by contrast, are large, they don’t take the abrasion a deck does, they don’t have nooks and crannies, nor do they have pooled water on them.

Step No. 2: Be honest about your personal energy level
For each of the three main outdoor wood situations, there are a range of simple to complex finishing options to choose from. And as is usual in life, the choices that look the fanciest are also the most expensive and labour intensive to maintain. The most work of all comes with the choice that seems to be a perennial favourite: keeping new wood looking new and bright. The finishing strategy that’s right for you depends on how much ongoing work you’re willing to invest in exchange for a specific appearance. Just remember, finishing wood doesn’t extend its life or prevent rot. It’s just about looks.
Step No. 3: Understand your choices
There are five main families of outdoor wood finishes in the world, and they affect the maintenance responsibilities you’ll be taking on.
Translucent film-forming finishes: These make outdoor wood look as refined as furniture, allowing grain patterns to show through added colour. The results are gorgeous, and the protective film is second to none at preventing surface cracks in wood caused by weathering. But as good as film-forming finishes look when new, maintenance will be challenging. As the film inevitably breaks down and peels (mostly from UV exposure), it usually requires complete stripping of the finish before fresh coats can be applied. That’s a lot of work, especially if you’re working with a railing or outdoor furniture.

Opaque film-forming finishes: These look like paint, except the best formulations are tough enough to stand up to the abrasion on decks. Since these finishes are not transparent, they resist UV break-down better than tinted, film-forming products while also protecting against surface cracking of wood.
Coloured, no-film stains: These soak into the wood and form no surface film, and they don’t let visible wood grain show through (a drawback to most people), but peeling is never a problem. Although no-film stains are easier to maintain than either tinted or opaque film-forming finishes, they don’t offer much protection against surface cracking of wood caused by weathering.
Clear, transparent wood sealers: These help to preserve the natural, bright, uncoloured look of new lumber as long as possible. Just realize that “as long as possible” won’t actually be that long. The best transparent wood sealers offer about a year’s worth of protection against greying caused by weathering, then they start to break down. Retaining the natural look of new wood requires annual treatments with a deck brightening chemical, followed by pressure washing and possibly sanding before reapplication.
Exterior oils: These don’t form any sort of a surface film, but they do impart a golden or brown colour. Exterior oils never peel and are ideal for everything from light-duty surface protection to decks. Annual reapplication is always necessary (though no surface prep beyond washing), so that’s a drawback for some people.
Step No. 4: Choose a finish to fit the job
Are you finishing a deck? If you want refined, furniture-grade look for a deck that lets wood grain show through and don’t mind stripping and refinishing every three years, choose a translucent film-forming product. Want a longer working life? You’ll get about five years of respectable appearance on decks if you choose the best opaque, paint-like film-forming products. Transparent, clear wood sealers are appropriate for maintaining the bright look of a new deck, as long as you’re OK with annual stripping, sanding and maintenance.
Want as little deck maintenance as possible in your life? See “One-Time Wood Finish” on page TK for a unique Canadian option that’s also completely non-toxic.
Got a fence? Since these are big—and fences are usually OK looking a little rustic anyway—you might consider leaving the wood bare. If you want to add colour, no-film stains are way less time consuming to maintain than film finishes since they never require stripping.
Wood siding usually covers large areas, like fences do, but a rustic look isn’t in keeping with all houses. If you’re not happy with barnboard-grey siding, a film-forming finish is your best choice. Anything less allows surface cracks to form in the wood from weathering, eventually allowing water to penetrate the siding and possibly enter wall cavities.

Exterior wooden furniture should never be finished with any kind of film-forming finish, either translucent or opaque. That’s because it’s so difficult to strip an old, peeling finish because of all the nooks, crannies and narrow gaps between parts. Some no-film stains work well for furniture, but test products to make sure they don’t rub off on clothing. Annual application of exterior finishing oil is an excellent option that maintains a refined appearance.
Finishing exterior wood isn’t as simple as it looks, and that’s why you’re wise to do your homework before walking into a hardware store on a sunny Saturday morning, choosing whatever looks good. Select products with care, come to terms with the maintenance chores they require, then avoid the nasty surprises that catch a lot of Canadians off guard when it comes to outdoor wood. For detailed results from the deck finish testing I’ve been doing since 1990, visit baileylineroad.com/how-to-stain-deck-properly.

Sanding is Key
New wood can’t hang on to a finish well, and neither can old wood without prep work. The best surface for the longest finish life is a dry, freshly sanded one. Pressure-wash new wood, then let it dry before sanding with a 60- or 80-grit abrasive. By pressure washing first and sanding later, you’ll get faster and better results than sanding alone.


One-Time Wood Finish
The low maintenance of outdoor wood is what attracted me to a Canadian product called Eco Wood Treatment more than 10 years ago, and I’ve been using it on my own projects ever since. It’s a powder you mix with water and apply to new, bright lumber as an odourless, non-toxic liquid. I usually use a pump-up weed sprayer for application. A few hours after it goes on, Eco Wood begins to create an even, weathered appearance by chemical reaction. Full results take months to appear, but you only ever have to apply it once. Not everyone is OK with a weathered look, but for those who do like it, the “weathering” is even and much nicer looking than the natural effect. The Nova Scotia–based manufacturer has just come out with additional colours beyond the natural grey. You’ll find Eco Wood Treatment at Home Depot and online at ecowoodtreatment.com. Cost for a pouch of powder to make about four litres (one gallon) of solution is $25.
Wooden Windows a Special Case
Finishing wooden window sashes requires a special approach on three counts. First, stripping, sanding and re-coating windows is a huge pain. You can easily spend three or four hours on each small window. Second, stress on the finish is huge, thanks to intense UV exposure and lots of places where water can slip in between glass and sash. And third, the amount of finishing product required for windows is tiny compared with the labour involved in applying it.

These three issues led me to try a traditional linseed oil paint back in 2008, and after 10 years of watching the results, I’m happy. The claim to fame of this stuff is that it never peels, even after four or five decades of exposure. All it does is wear out, meaning that finish maintenance is simply a matter of re-coating. Dark colours do stain lighter areas of walls below over time as the weathered paint turns to powder and washes down with the rain, so that’s a drawback, too. If you’re stripping an old finish, as I did, slake the thirst of the old, bare wood with linseed oil made especially for use with the paint. The paint itself is slow to dry, expensive, prone to runs and must be brushed out extremely thin or it will crinkle as it dries. Why put up with all this? Since linseed oil paint doesn’t peel, it eliminates the need for the scraping, stripping and mind-numbing insanity that refinishing wood-framed windows usually involves. I consider it a good trade for many situations. The stuff I’ve used is called Allback (solventfreepaint.ca).

Steve Maxwell and his wife Mary live on a 90-acre modern homestead on Manitoulin Island, Ontario in a stone house they built with local materials beginning in 1985. Steve is Canada’s longest-running home improvement and how-to columnist and editor of Home and Property. He divides his time working on the land, building things large and small, and creating articles and how-to videos that teach sustainable, self-reliant, hands-on living skills.


